The Threadripper is impressive in many aspects, but its size is just unprecedented! You can easily fit three LGA 1551 CPUs in one Threadripper die!
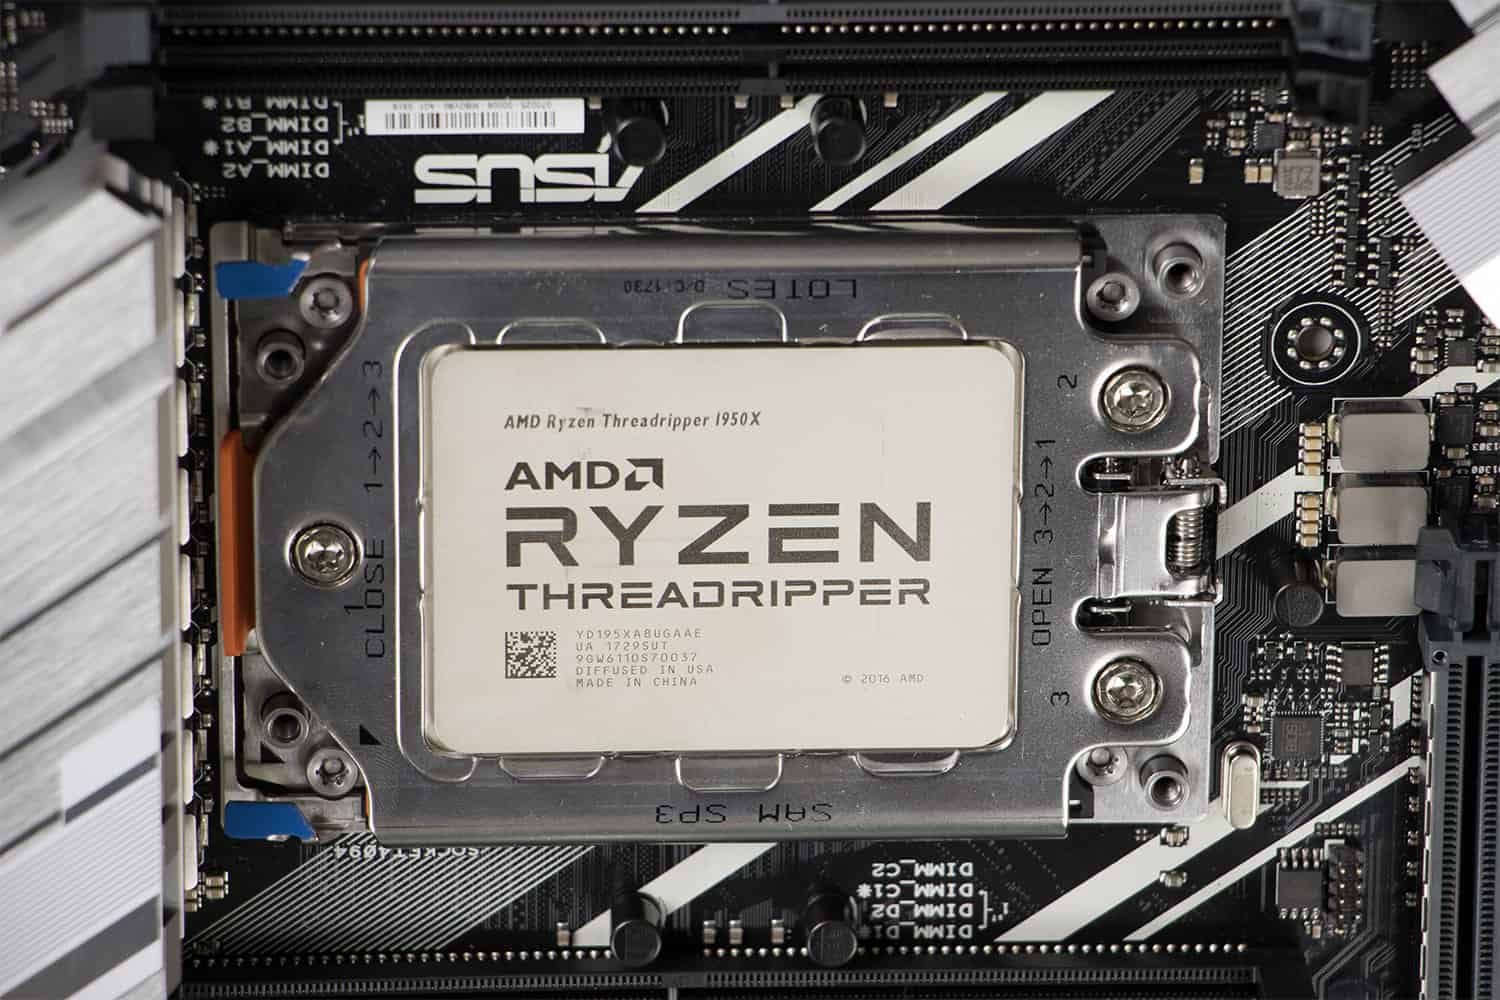
And logically, this does replicate in the TR4 socket size. No less than 4094 pins are populating this massive micro estate! For the first time, AMD went for an LGA design, meaning that the pins are indeed transferred from the Processor itself to the motherboard.
Intel started to so do so a solid decade ago, going on the principle that most of the PGA processors were damaged at pin level, and by transferring the pins to the motherboard, damaged could only occur on the least expensive components.
Problem is that pins are infinitely more sensitive and delicate on the motherboard than it has ever been on a CPU.
And having 4094 pins does represent 4094 occasions to irreversibly damage your board (and that is of course not covered by manufacturers limited warranty!).
So when following the steps below, make sure to wear a short-sleeve shirt, to work on a spacious and clear area, and go slow!
Step 1
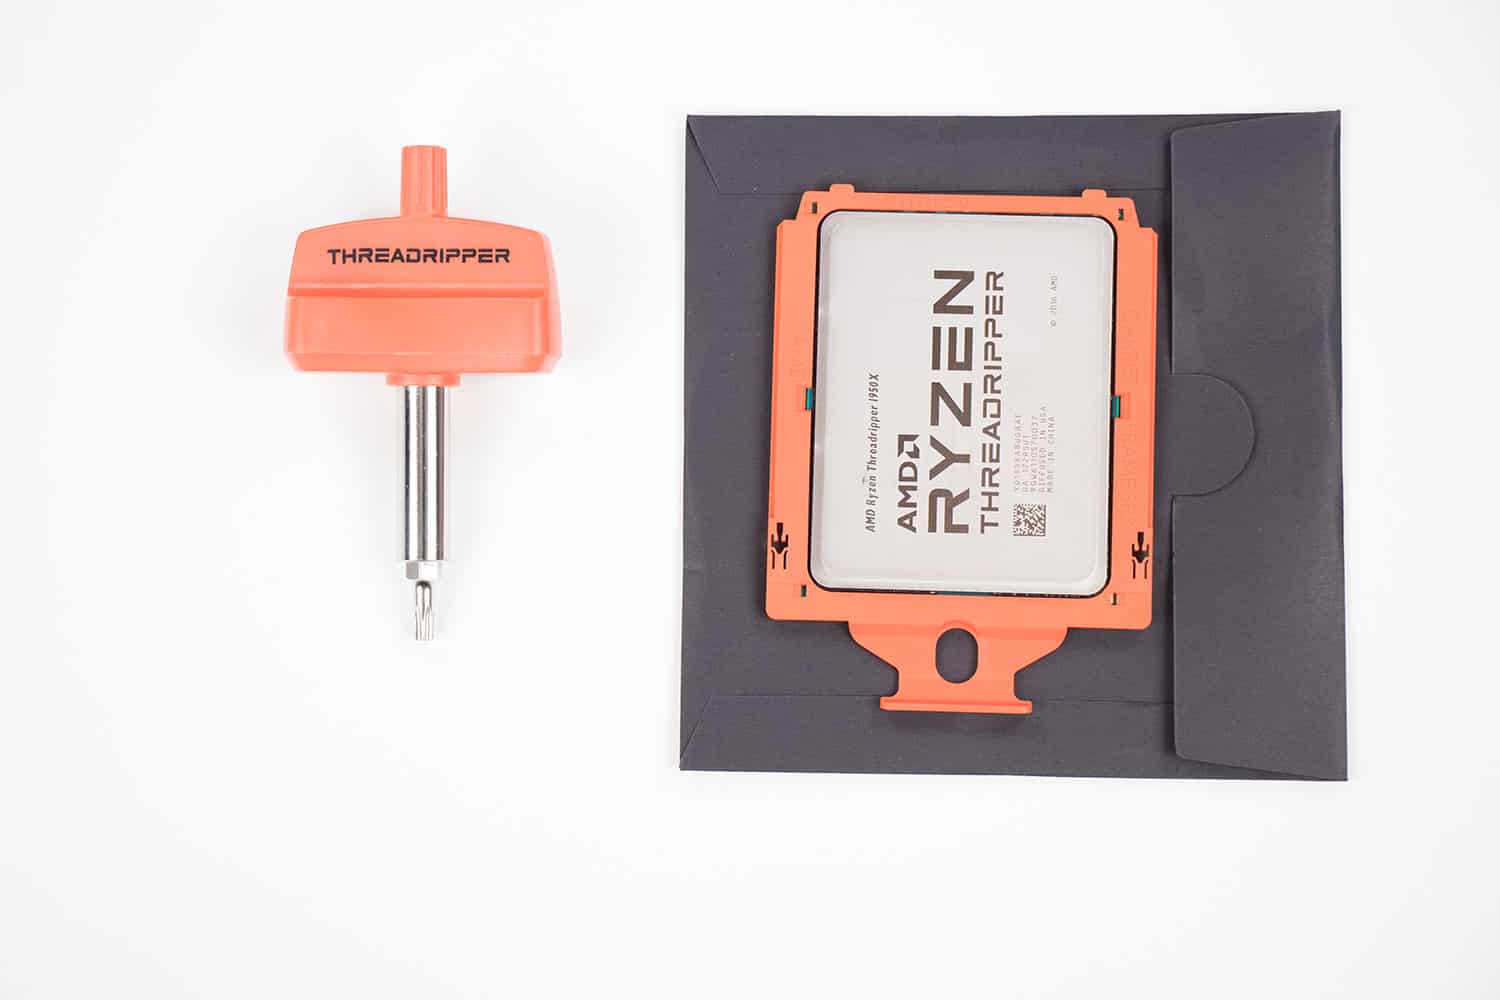
Make sure to have both your Threadripper and its proprietary torx screw driver available to you. Keep the CPU in its protective cassette!
3 screws to remove
Just like its CPU boxing, the TR4 socket comes with multiple protective layers which will remove one by one!
Let’s jump on the TR4 socket, and start its unlocking (not as straightforward as you may think!).
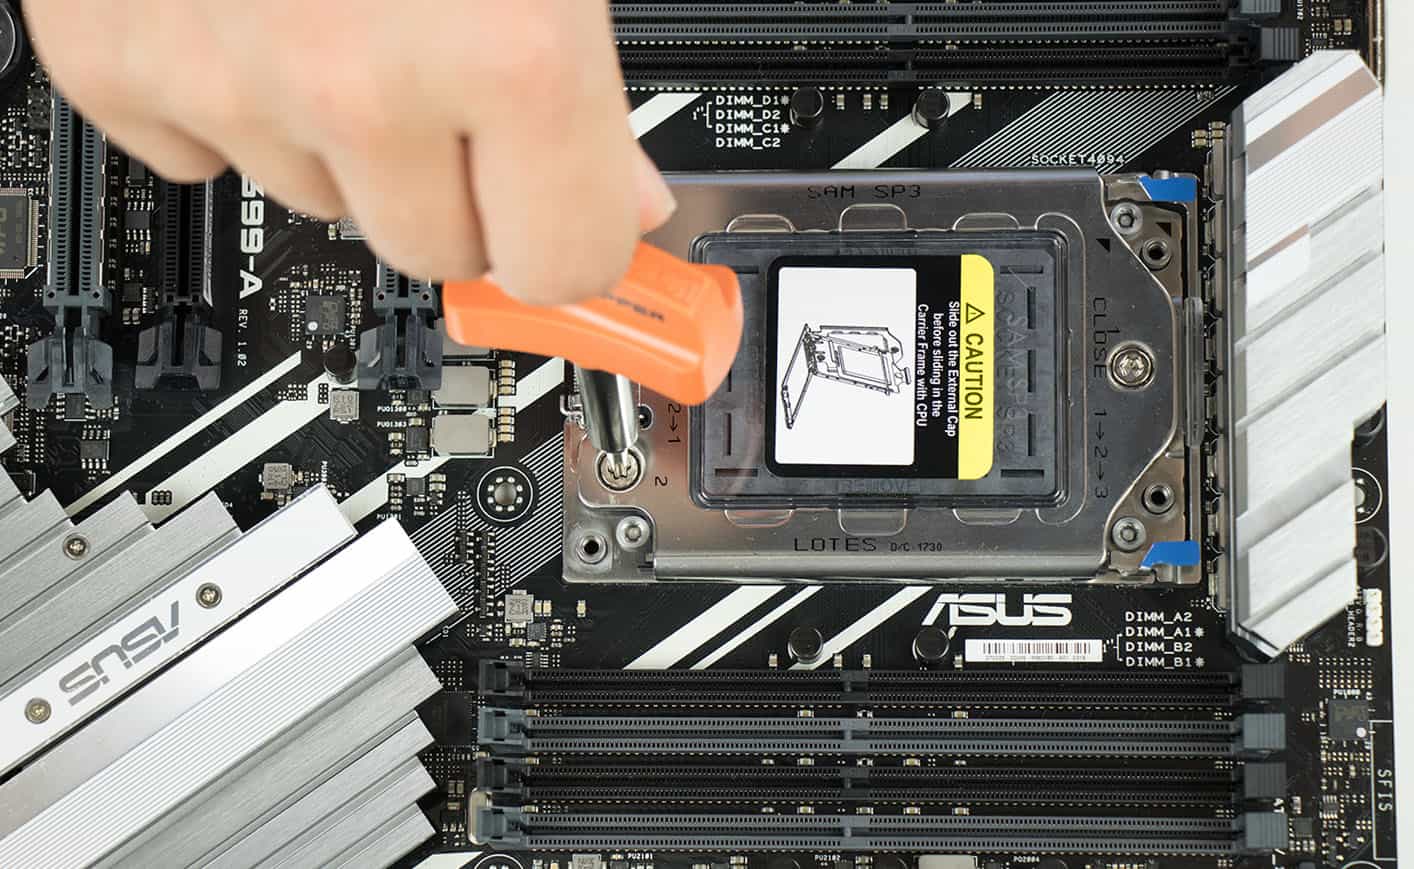
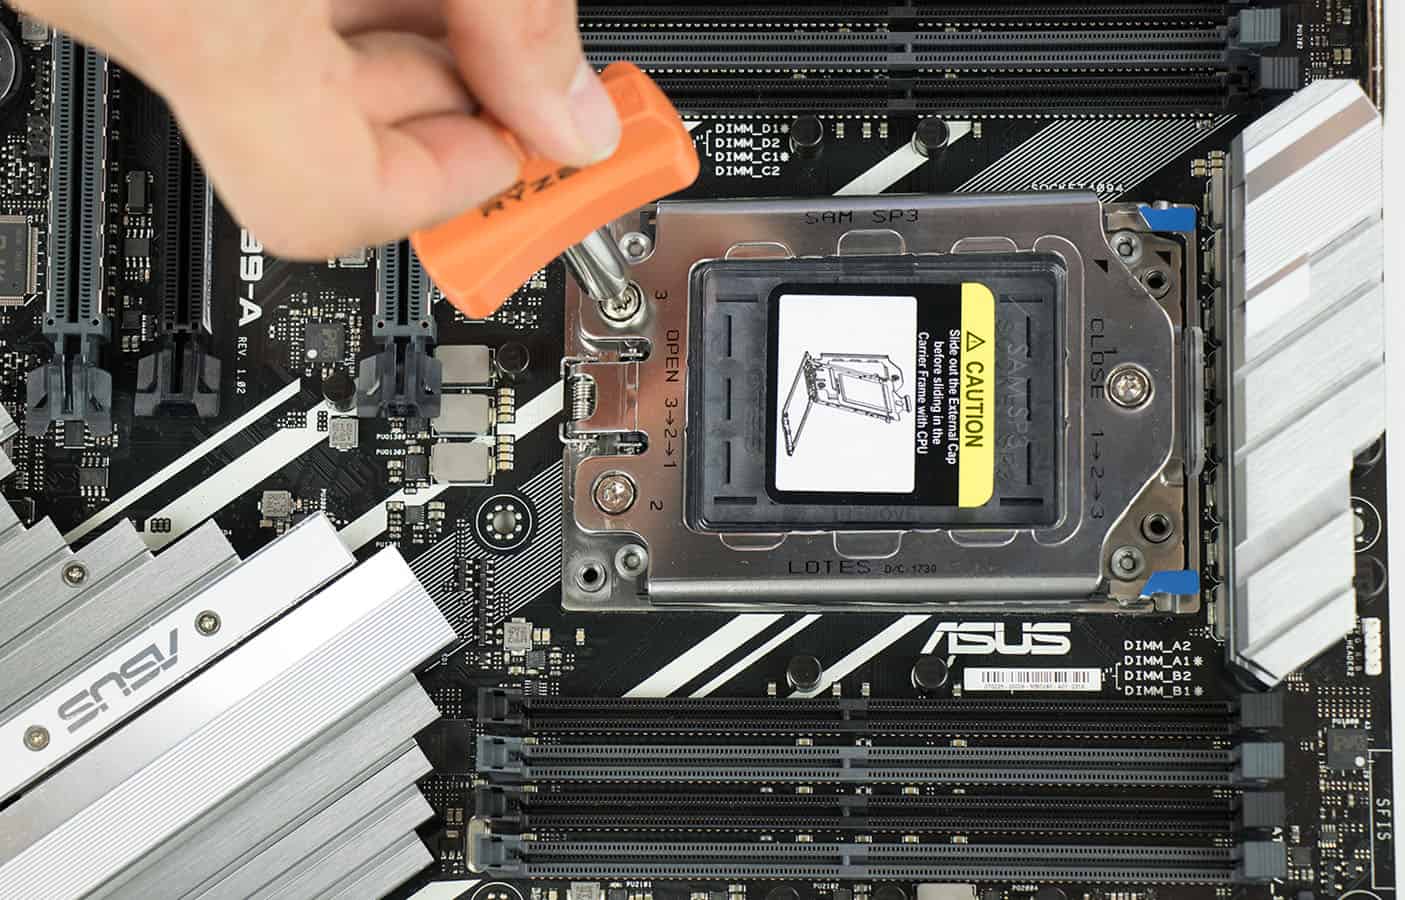
And in order, please. First the single screw right next to the peripheral deck.
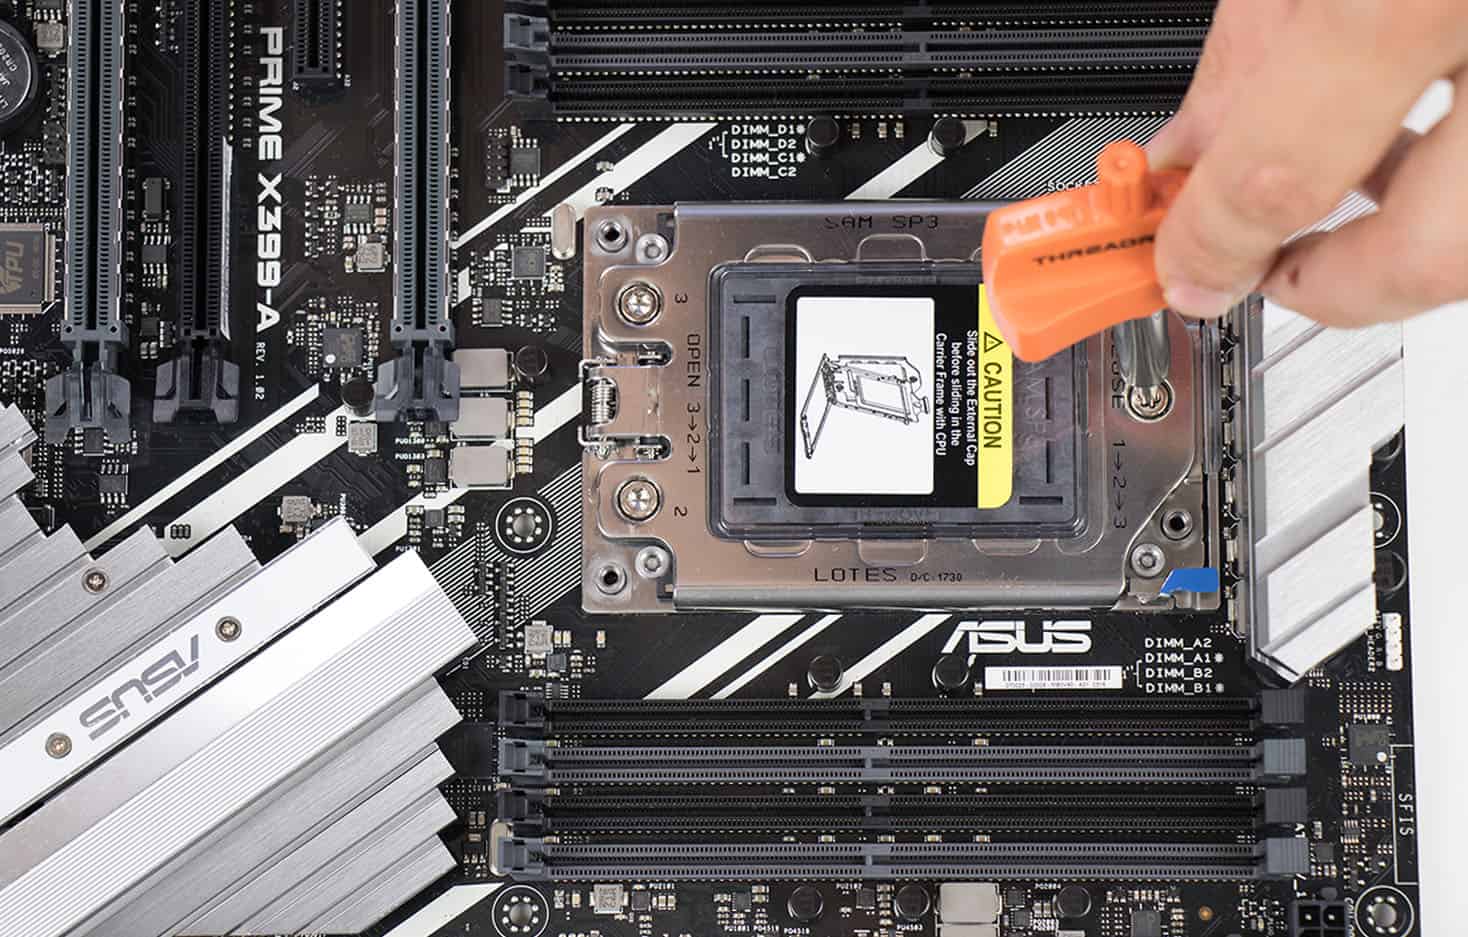
You cannot completely remove the Torx screws out of the bracket (which is a good thing). So stop unscrewing them once they are free spinning.
STEP 2 CPU insertion (I know… I know)
Nothing prevents us from lifting the rail frame, any longer.

Remove the see-through external cap (pulling up) and slowly insert the Threadripper CPU with its orange protective CPU on!

STEP 3 Closing and securing the bracket
The CPU cassette should be resting on its own and in its entirety in the socket slide-bracket. Go slow, it can get tricky.
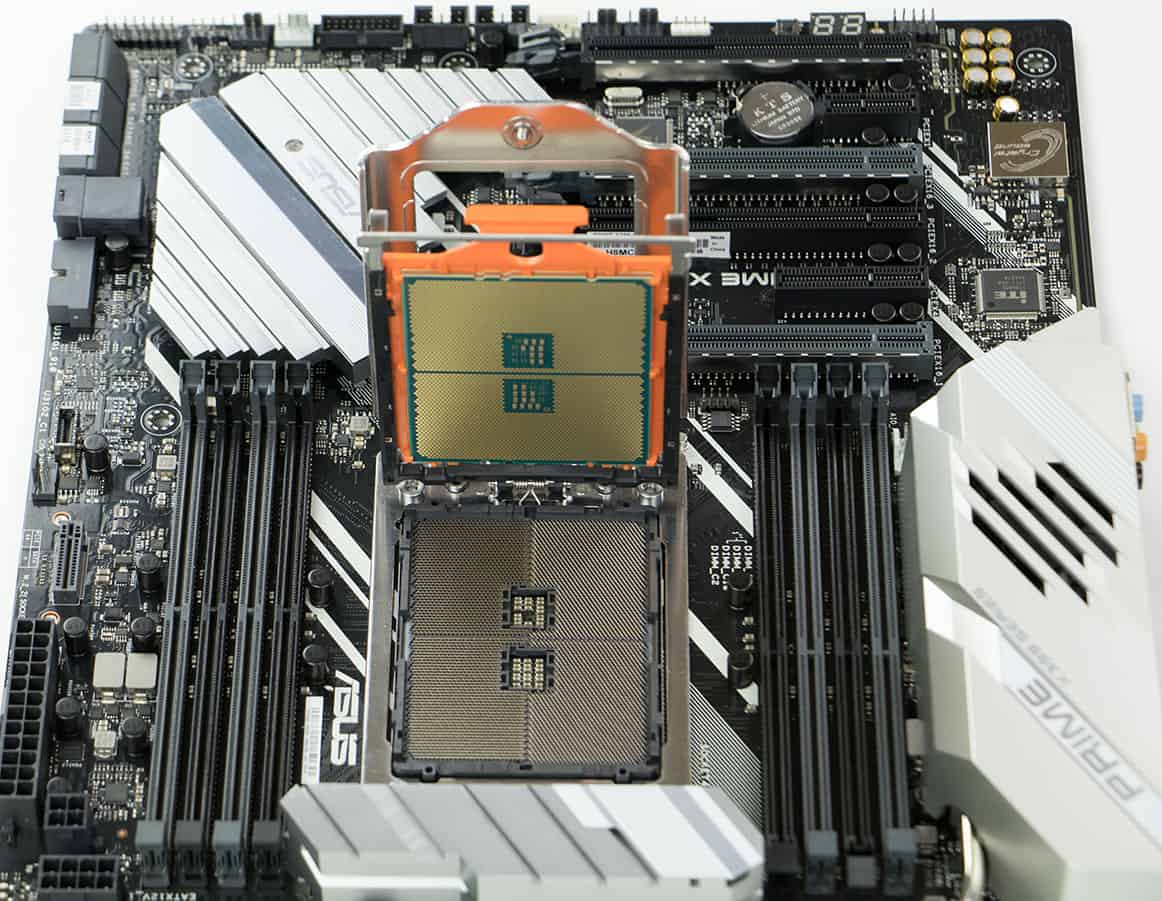
VERY gently, remove the pin protector (that’s the PNP black thingy hiding the 4094 pins), and don’t even think about touching or even looking at these pins too long! Just don’t!
There is a reason why AMD concocted this torturous mechanism!
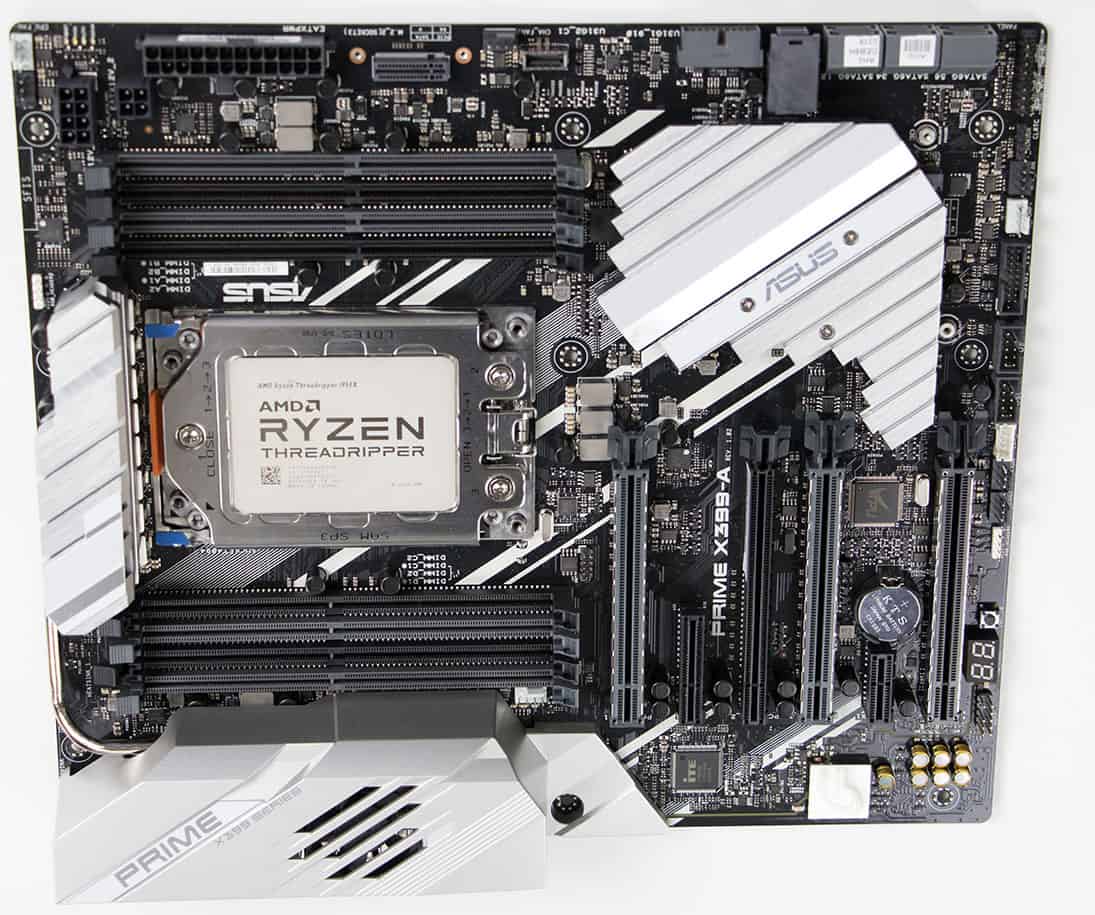
Now we can close the CPU bracket and start securing back the three hex screws. I would start with the single HEX screw to stabilize the all thing!
That’s it, I hope this DIY helped you getting your build where it needs to be 🙂
Difficulty : Medium-Advanced
TIME CONSUMPTION - 9
DIFFICULTY - 7.5
FRAGILITY - 8
8.2
Seems easy, but if you are not careful enough, you could be buying yourself a new motherboard!

One Comment